Unwrite Make
Tell it what you need in plain words, or hand it a standard and every dimension you've got. Make builds the part properly, shape by shape, so the edges stay sharp where they should be and the curves don't go lumpy. You'll get something you can spin around on screen, a drawing with the sizes marked on it, and files that open straight into your CAD program or your slicer.
You get one design a day on the free plan, and signing in is just a code we email you.
How Make works
It’s three steps, and you don’t have to do all three.
Say what you need
Type out what you're after, or photograph the thing that broke and upload that. A sketch on paper works fine, and so does a part name with a standard and a full set of dimensions if you've got them.
Watch it build
You'll see the part appear on screen as it's built, one step at a time. Change a measurement and it rebuilds with your change in it.
Take the files
Grab the STEP for your CAD program, the 3MF for your printer, and the drawing with all the sizes on it, as a PDF or a DXF, for the workshop.
Where people use Make
Small businesses, home workshops, and people teaching themselves 3D modelling as they go. None of them had to learn CAD first, and none of them should have to.
Around the house
The peg a fridge shelf sits on, the rubber foot off a laptop, the end cap on a vacuum roller with hair wound round it. Nobody opens a CAD package for a job that small, so the thing stays broken or the whole appliance goes in the skip. Photograph what's left of it, say what it has to fit, and print the replacement this evening.
In the workshop
Jigs, spacers, saddles, and spares for machines whose manufacturer stopped answering the phone about thirty years ago. A small shop needs one part on a Tuesday, and that's never been worth a CAD licence and the fortnight of learning that comes with it.
Beside the CAD you already run
Plenty of people drive professional CAD all day and still don't fancy opening it at nine at night to knock up a spacer. Describe the part here instead, then take the STEP straight into your usual program if it wants finishing off. Nothing you get back needs rebuilding first.
Working an idea out
Modelling something you've never modelled before goes quicker when you can describe it, look at it, and change your mind twice. Ask for a shape, spin it round, say what's wrong with it, and the next version arrives with your change in it.
Things people needed, and what came back
These are real jobs. The photograph is the one that was sent, bad kitchen lighting included, and the words underneath it are exactly what was typed.
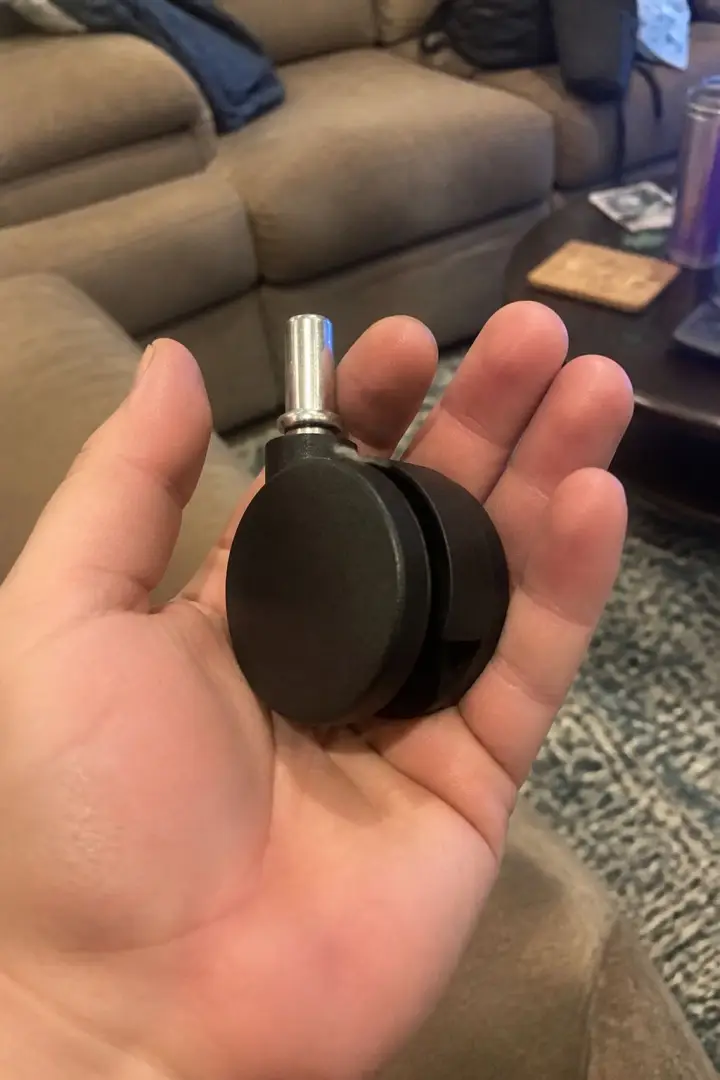
What they sent
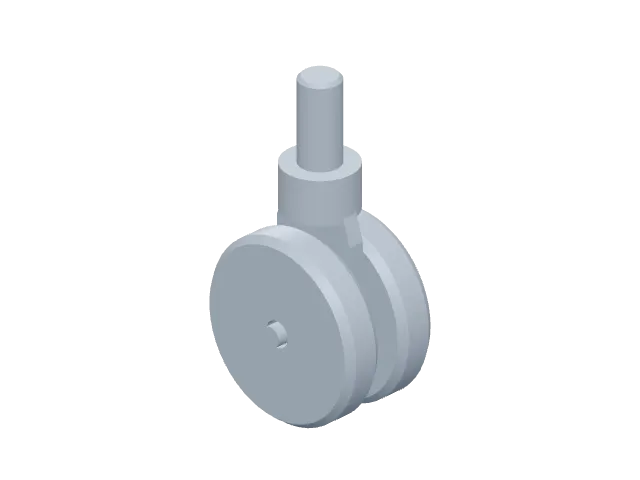
What came back
From a photograph
Office chair caster
“this wheel thing fell off the office chair, thats it in my hand. can you copy it? no ruler sorry”
A twin-wheel caster with a central fork, free-running wheels and a push-in stem.
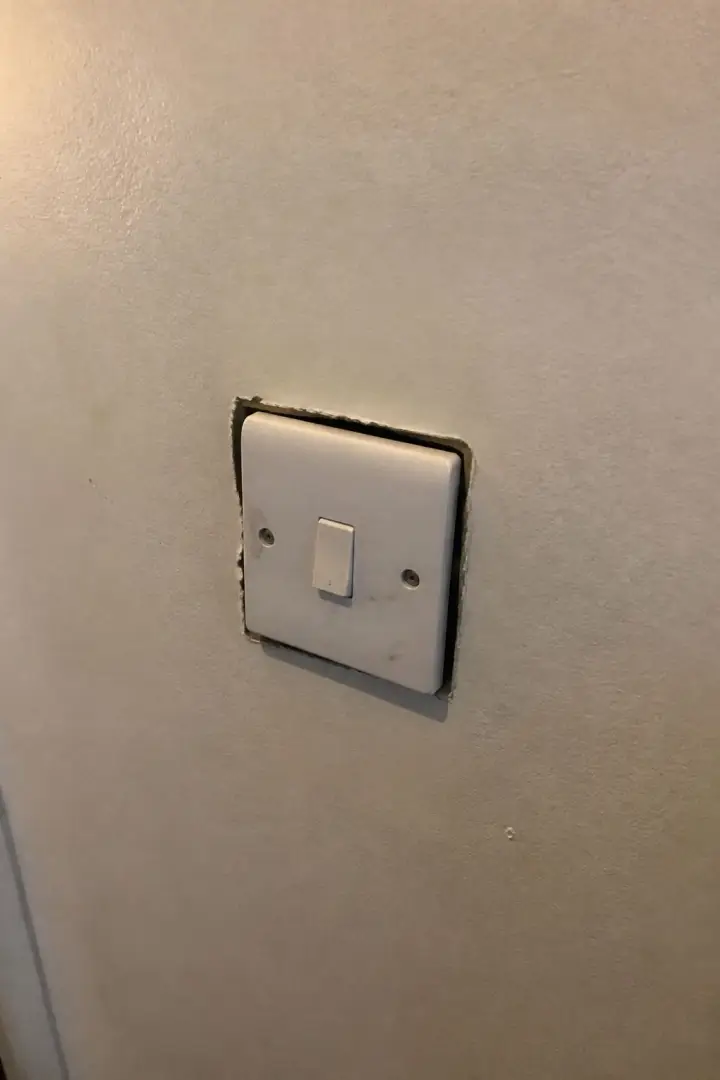
What they sent
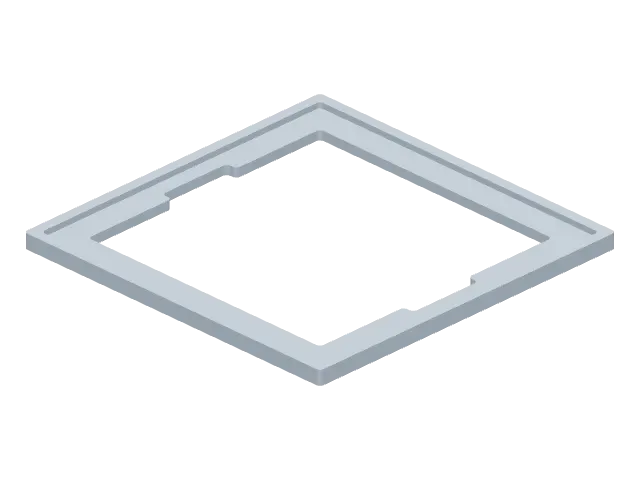
What came back
From a photograph
Light switch spacer
“light switch sits proud of the plaster, theres a gap around it. i dont need a new plate, i need a little frame/spacer that goes behind so it looks finished”
A thin surround that sits behind a light switch and covers the gap in the plaster.
What they sent
What came back
From a photograph
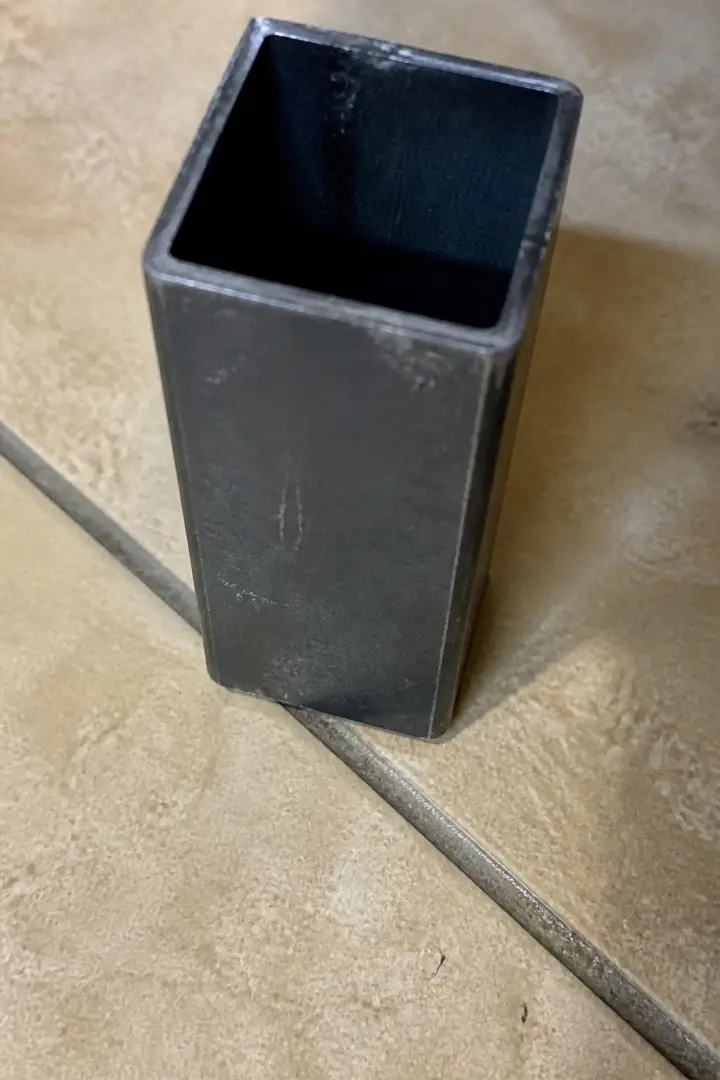
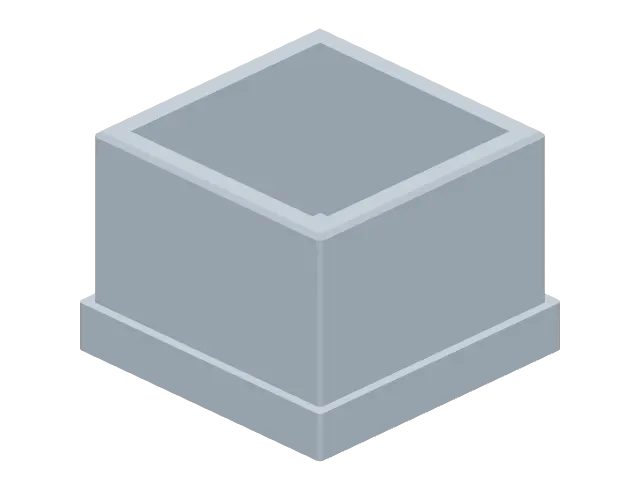
Chair leg foot
“this but a foot for it”
A push-in foot for the open end of a square chair leg.
What they sent
What came back
From a photograph
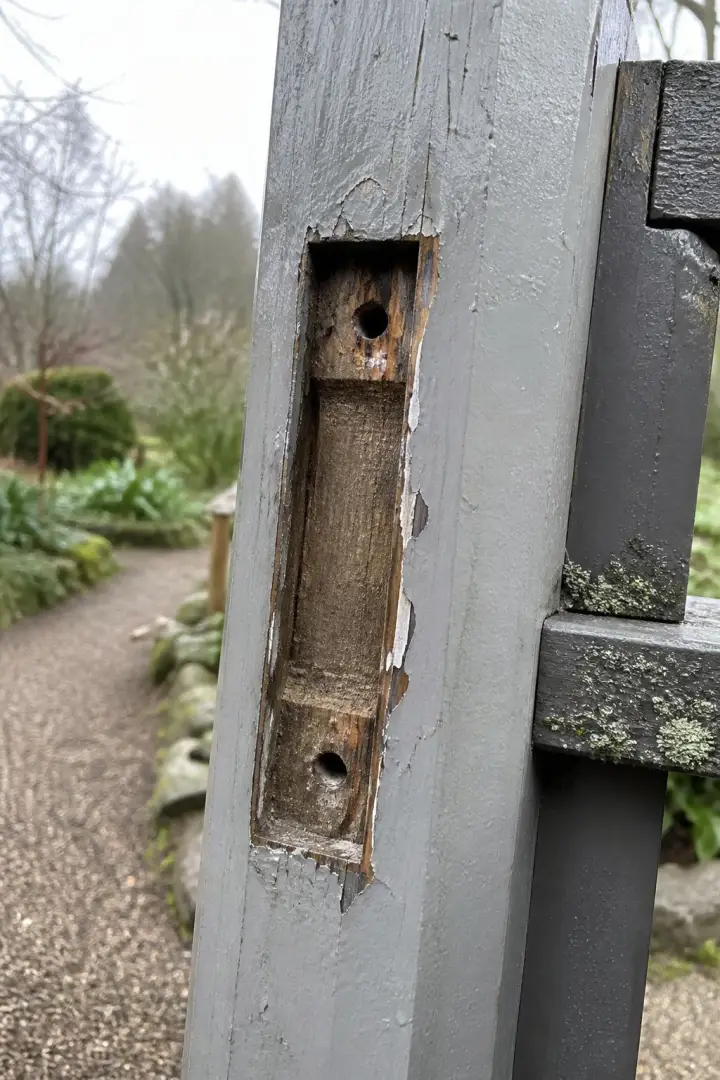
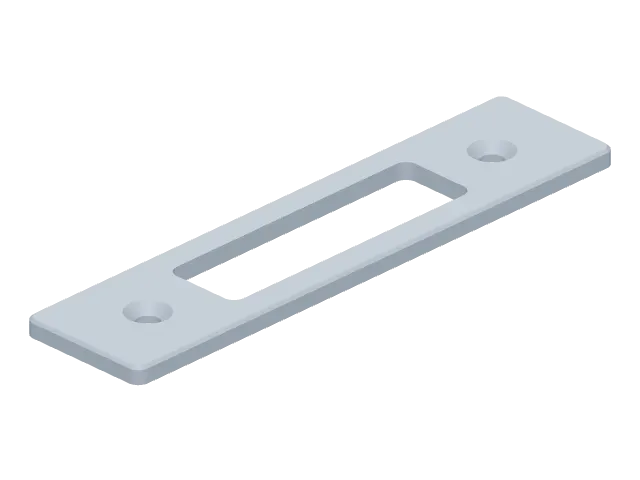
Gate latch plate
“latch plate is gone, thats the recess in the post. make me a new plate that sits in there. painted wood, outdoor”
A keep plate for the mortise left in a gate post when the old one went.
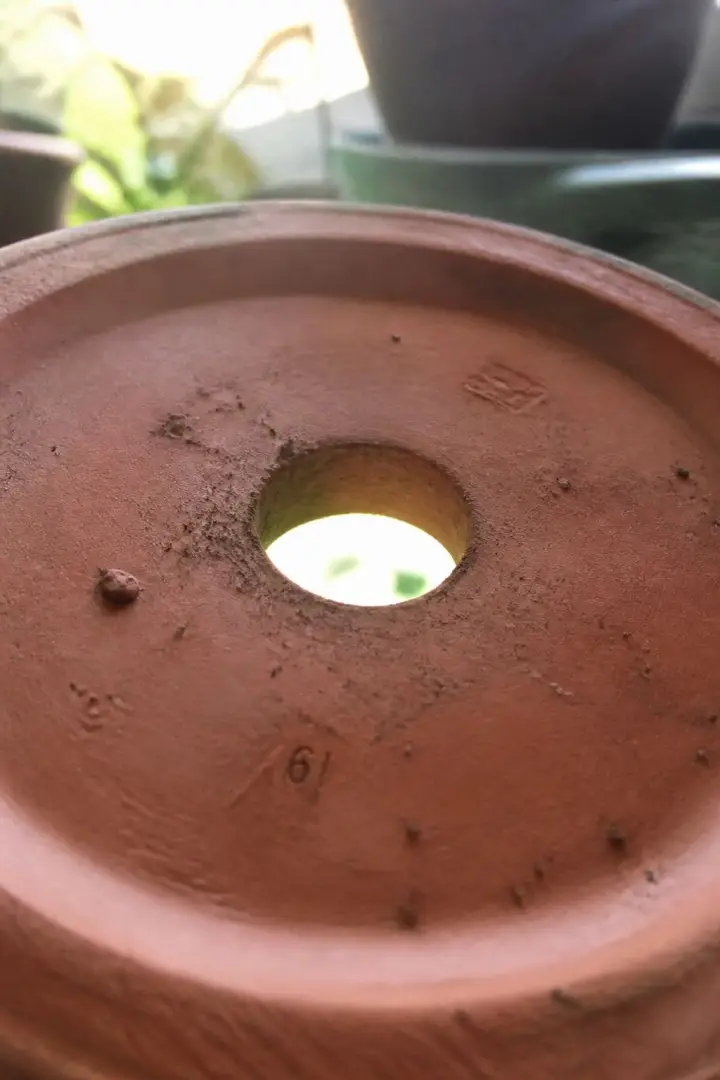
What they sent
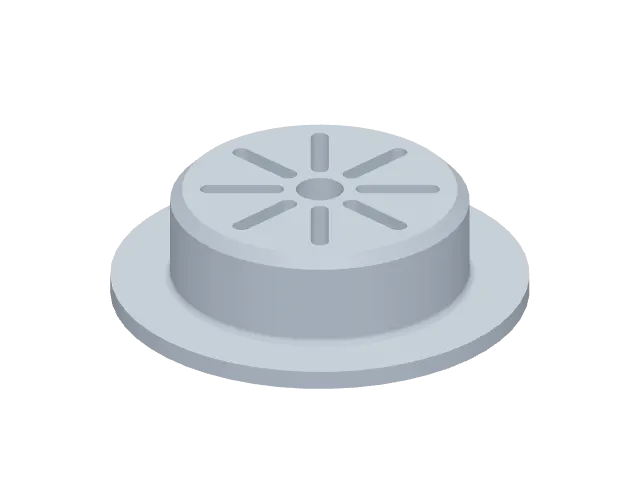
What came back
From a photograph
Plant pot drainage plug
“the hole in the pot is too big and soil falls out. want a little mesh plug that sits in that hole. pot is flipped in the pic”
A slotted plug for a pot hole that keeps the soil in and lets the water out.
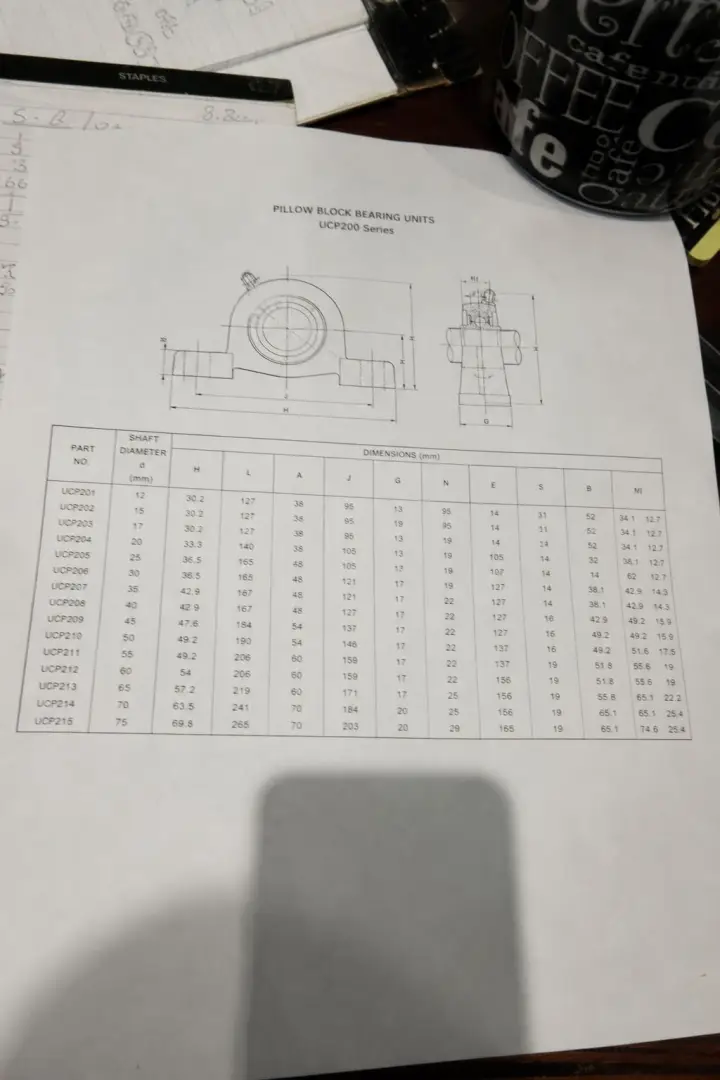
What they sent
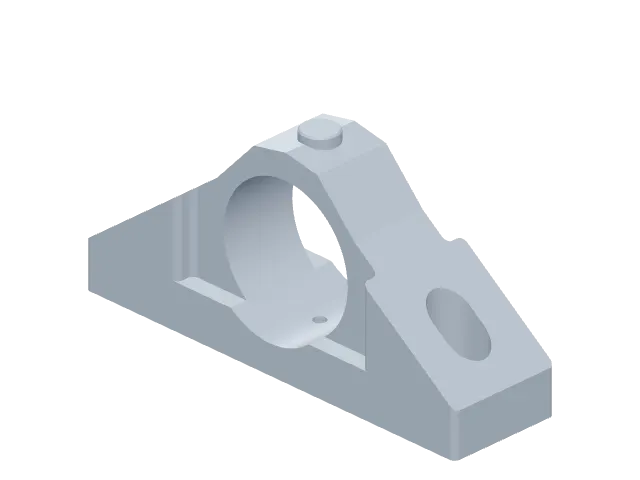
What came back
From a page out of a datasheet
UCP204 pillow block
“make the pillow block from this page, i photographed the printout because i cant find the file. no part to copy just the numbers”
A pillow block housing built from a photograph of a printed datasheet.
7 more are in the gallery. Rotate them and download the files, and you won’t be asked to make an account first.
Every edge is there on purpose
Make is a 3D modelling and CAD tool where an agent does the modelling, and it designs the part rather than generating it. Ask most AI tools for a 3D model and what comes back looks about right until you zoom in, where you find stray edges, dimples across a face that ought to be flat, and corners folded in on themselves. Make works out which shapes the part is made from and builds them one at a time, in order, the way you would if you were doing it by hand.
That's the difference between a part and a picture of one. A hole has a diameter you can measure, a rounded corner has a radius, and a thread has a pitch, so every figure on the drawing is a real one and the STEP opens in your CAD program with the shapes still separate and still editable. Change a size afterwards and the part rebuilds around it, because Make kept the recipe rather than the finished lump.
Curves get the same care as corners. Traditional CAD tends to fight you the moment a shape stops being flat faces and right angles, which is how a swept handle or a rounded finial becomes an afternoon of work. Make blends one profile into another, runs a shape along a curve, rounds an edge that crosses two curved faces, and traces a freehand outline straight off a photograph, and what comes back has real surfaces on it you can measure and round off further. Describe that finial with six numbers and it comes back as one turned surface rather than six flat bands with a crease at every joint. It also checks the 3MF will print before you ever see it, and if something has gone wrong it refuses the part and names the feature at fault.
Say as much or as little as you like
Any of these will get you going, and you can fill in the detail later if it turns out you need it.
The standard and every dimension
Name the standard, give the sizes, and that's what comes back, with a real helical thread on it rather than a smooth cylinder pretending.
“M8 threaded rod, 50 mm long, coarse pitch, both ends chamfered.”
Only the shape
Describe the proportions and sort the sizes out later. It comes back the right shape, and scaling it to your print bed is one step at the end.
“A round knob with ribs round the outside so it grips, and a flat top. Size does not matter yet, I will scale it before printing.”
Pricing
Signing in is just a code we email you, so there’s no password to set up or forget.
Make Free
US$0
- 1 design a day, up to 8 a month
- Projects kept for 30 days
- Personal use
Make Pro
US$19 a month
- 100 designs a month, at most 10 in one day
- Projects kept while you subscribe
- Commercial use allowed
Your designs stay yours
Make runs on its own site, separate from the free tools, and nothing you send is used to train a model. Download your files whenever you like, and delete a project yourself once you’re done with it.
Ready to make a part?
Start with a sentence about the part you need. Your first design is free, and whatever it makes is yours to download.